
Hacking A Mitsubishi Heat Pump Part 2
In my previous post I showed how to use a cheap Arduino to connect wirelessly to a Mitsubishi heat pump to control its settings. Yet, it still took some work to connect to the device access point/web server. Having multiple heat pumps in your home is even more laborious. Without a lot more work, you also couldn’t communicate directly with them from outside of your Wi-fi network. What we need is a centralized app that can communicate with the Arduino more directly.
MQTT
From the mqtt.org site: MQTT is a machine-to-machine (M2M)/”Internet of Things” connectivity protocol. It was designed as an extremely lightweight publish/subscribe messaging transport.
I won’t go into too much detail on how MQTT works, but it is essentially a Publish/Subscribe messaging model (publish messages/subscribe to topics). Clients connect to a MQTT broker to subscribe to topics they want and publish messages to topics.
Hass.io and Home Assistant
From the Home Assistant site: Hass.io turns your Raspberry Pi (or another device) into the ultimate home automation hub powered by Home Assistant. With Hass.io you can focus on integrating your devices and writing automations.
Home Assistant is the centralized app we needed. This provides the MQTT Broker (Mosquitto Add-on) and a great UI. It also has some advanced home automation capabilities. You can access it from your browser or from your phone via the free Home Assistant app. To access outside your Wi-fi network you will have to enable port forwarding of the port and ip address that hass.io is running on. See instructions for your specific router if supported.
The best installation instructions I have found are in the below video: https://www.youtube.com/watch?v=qnCRcGTznXs
As well as the hass.io documentation
While you could install Home Assistant on Windows, it is not fully supported and not all third-party modules work. Because of this reason (and since I have never had the chance to play with one before) I opted to pick up a Raspberry Pi since it was the most common install platform.
I purchased the below Pi with a case.
CanaKit Raspberry Pi 3 B+ (B Plus) with Premium Clear Case and 2.5A Power Supply https://www.amazon.com/dp/B07BC7BMHY/ref=cm_sw_em_r_mt_dp_U_UTyiDbRW5SK29
I also bought a 32GB memory card for the Pi (not included in the above CanaKit)
Samsung 32GB EVO Plus Class 10 Micro SDHC with Adapter 80mb/s (MB-MC32DA/AM) https://www.amazon.com/dp/B00WR4IJBE/ref=cm_sw_em_r_mt_dp_U_VTyiDbZT8GYBT
After installing, be sure to install and setup the MQTT Broker (Mosquitto Add-on) so the code running on our Arduino can connect and publish MQTT messages. Note that I had to use the ip address 172.17.0.1 (the docker network default gateway) for the broker to get it to work properly. I found that fix in this reddit post to the homeassistant subreddit.
In Home Assistant, go to the File Editor and add the below to configuration.yaml
mqtt:
  broker: 172.17.0.1
  port: 1883
  username: <my mqtt user name>
  password: <my mqtt password>
  discovery: true
Code
UPDATED: 2/27/2020 I recently switched to using gysmo38’s MQTT module since my original post. It is much easier to deploy than the mqtt sample that was included SwiCago/HeatPump repo that relied on the HA custom component which would frequently be broken by Home Assistant updates. gysmo38’s code allows Home Assistant autodiscovery - no custom component hacking to ensure your heatpump appears in Home Assistant!
Download the code available at the below repo at: https://github.com/gysmo38/mitsubishi2MQTT
Note - the above code will have some dependency libraries required that you will have to download through the Arduino IDE. These include ArduinoJson and PubSubClient.
The features that drew me to gysmo38’s code:
- Easy to deploy - you don’t need to modify the code at all. Just flash it to your device and connect to the access point to configure it for you home wifi and mqtt server.
- Home Assistant autodiscovery and control with MQTT
- You can still control the heatpump by connecting over HTTP with a browser
Flashing the Arduino
- You don’t need to modify any code. Just open it in Arduino IDE and upload the code to your Arduino.
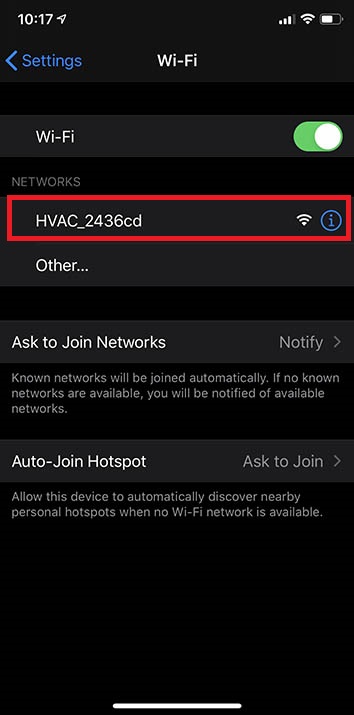
- Verify you can see a new wifi access point with a name “HVAC_XXXX”. From your phone or other wifi device, connect to the AP.
- After connecting to the AP, the below will appear. Enter a descriptive name for the device as well as the name and password for your local wifi network then click “Save & Reboot”.
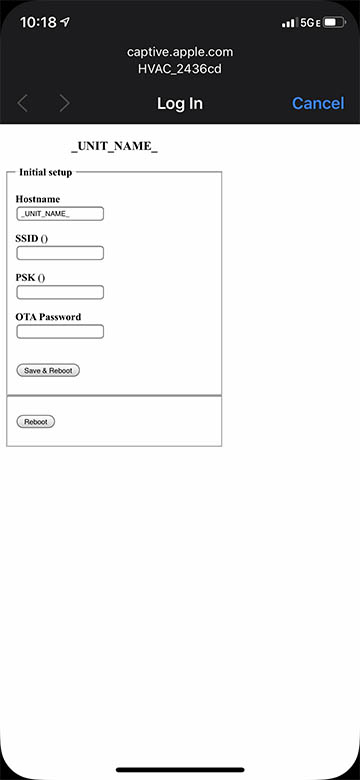
After restarting, the device should be on your local wifi network. If for some reason this step failed (ex: incorrect SSID/PW) the device will revert back to an access point. It may now require a password to connect to. The password is the same as the name of the AP (ex: HVAC_XXXX).
- Next you should configure the device to communicate with your MQTT server. Connect to the local ip address of the arduino (ex: 192.168.1.20) with a browser. You can log in to your wifi router to see the device and determine the ip address.
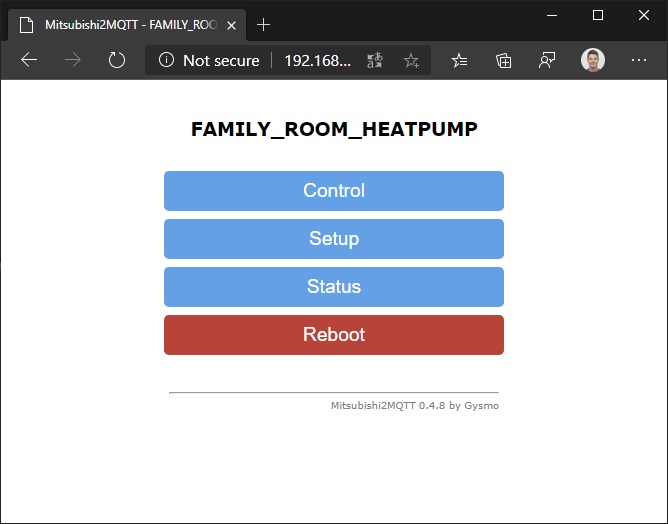
Click Setup
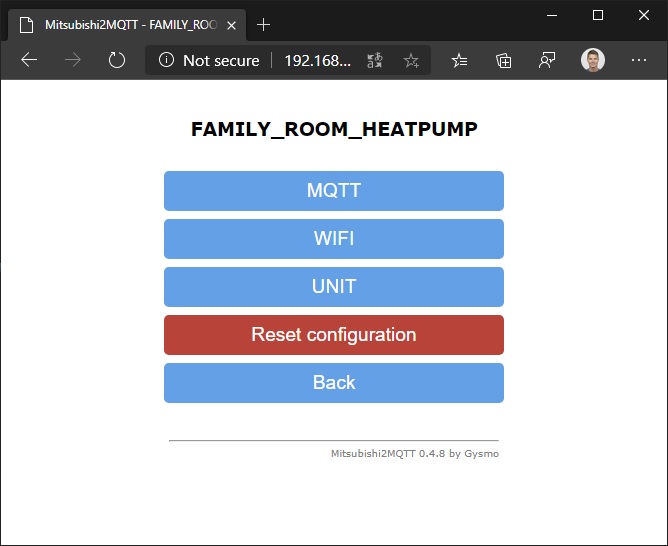
Click MQTT
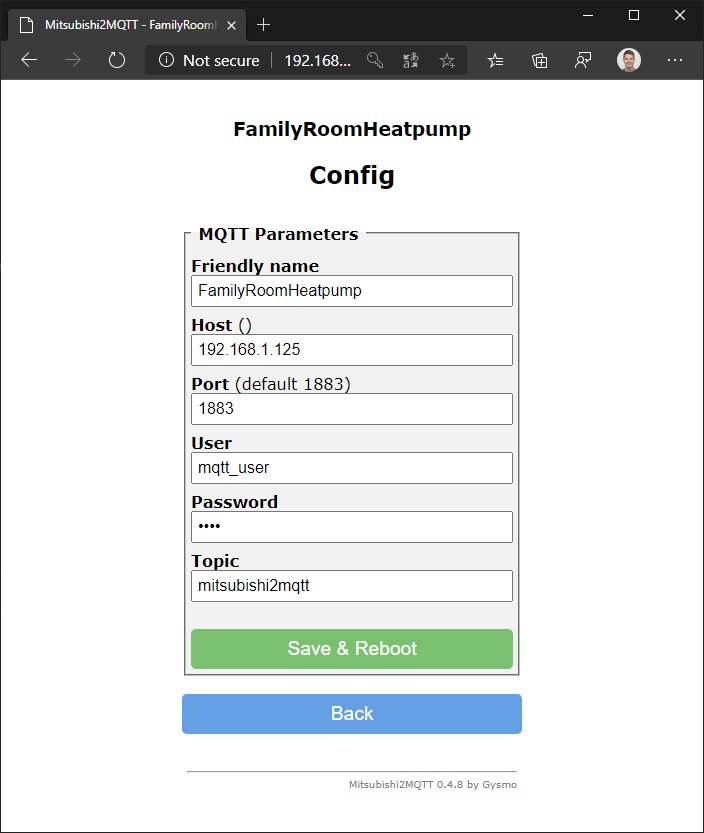
Enter the required information. Note that the host address is the ip address that Home Assistant is running on. Also note - for the friendly name DO NOT INCLUDE SPACES! Home Assistant has issues finding devices over MQTT that have spaces in them.
Click “Save & Reboot”
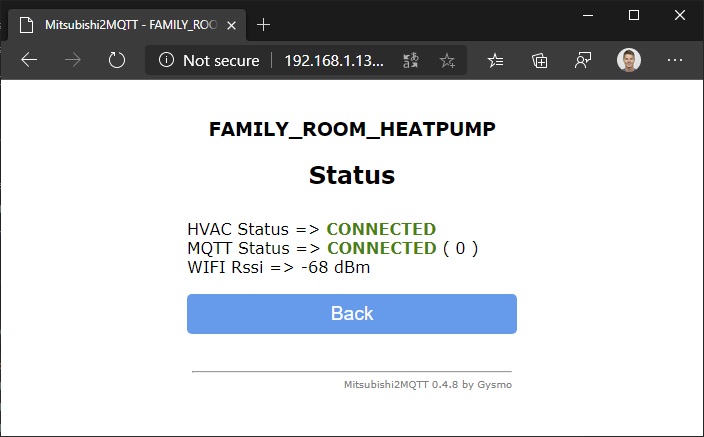
If you have Home Assistant installed or MQTT Fx you can verify that the devices are publishing MQTT messages with the default values.
After the reboot is complete, click the Status button on the front page. This will tell you if the connection to the MQTT server was successful.
- Finally, you should verify you can control your heatpump! From the main page click the “Control” button and modify the values.

Adding a Heat Pump in Home Assistant
From the top right menu, select Configure UI.
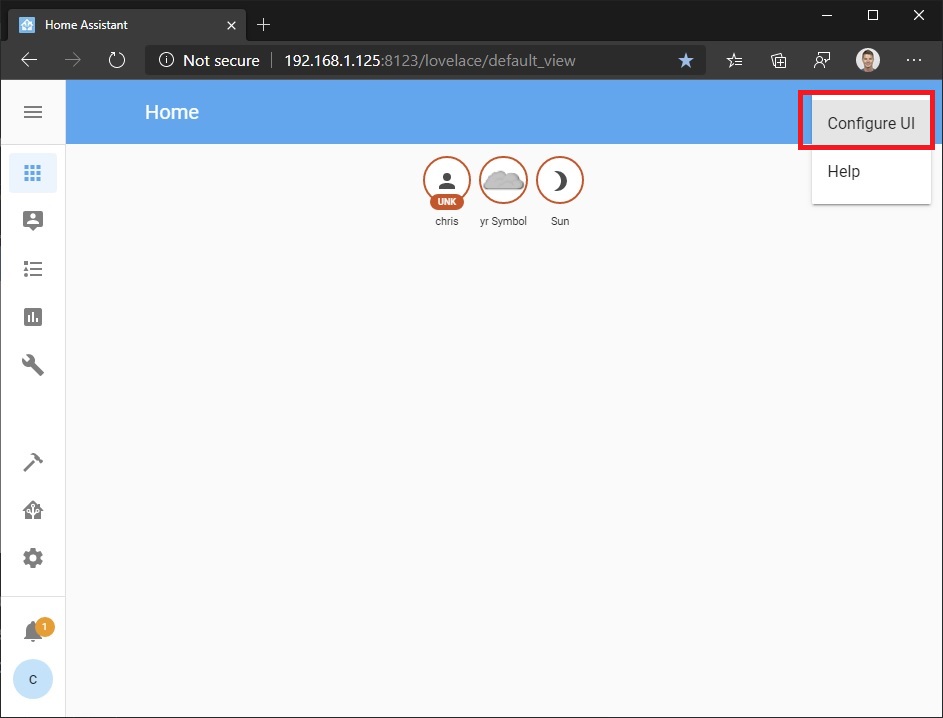
Next, click the “+” button. This will open the Card Configuration window. Click the Thermostat entry.
The Thermostat Card Configuration window will appear
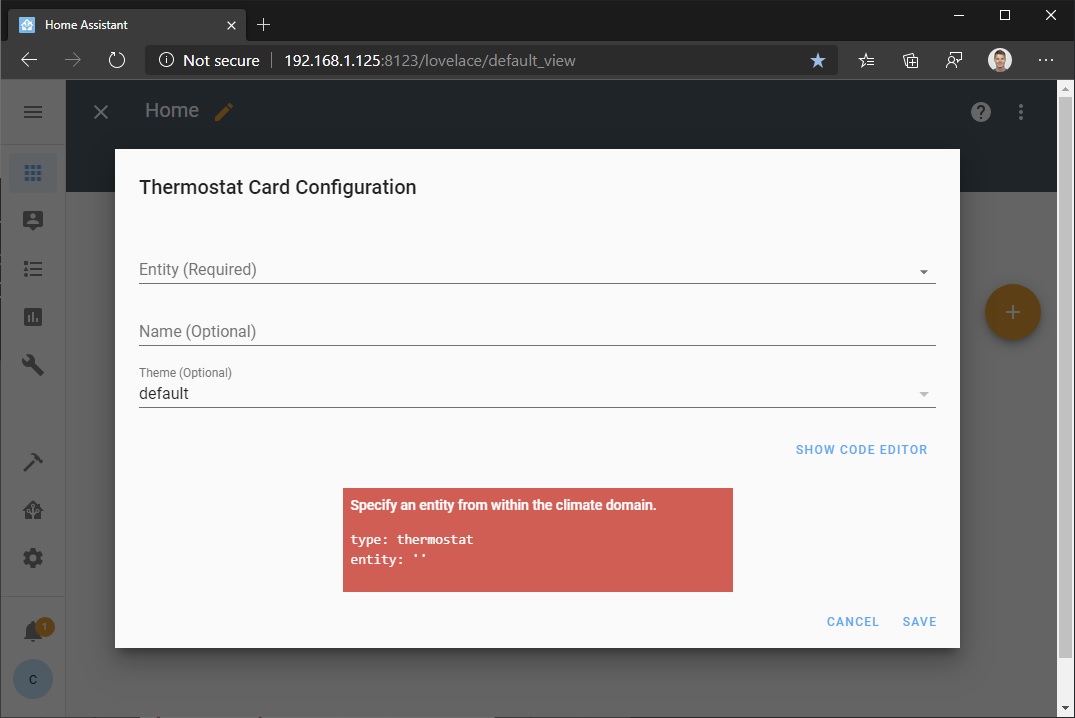
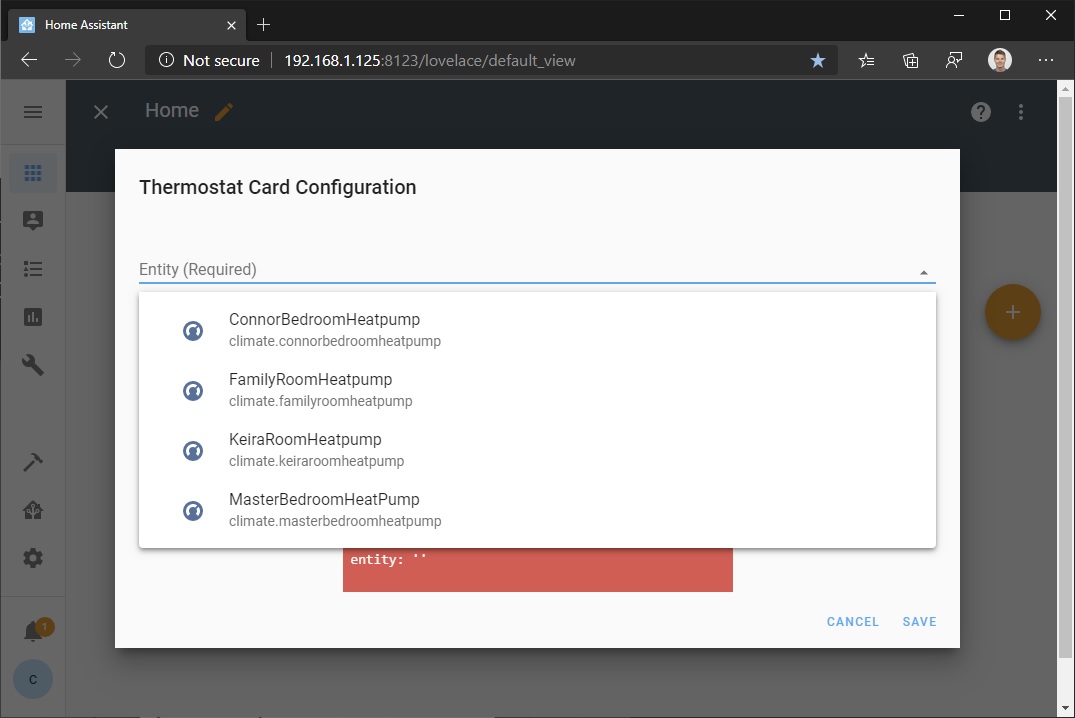
From the Enitity field, click the dropdown arrow. You should see an entry for the device you connected to your MQTT server.
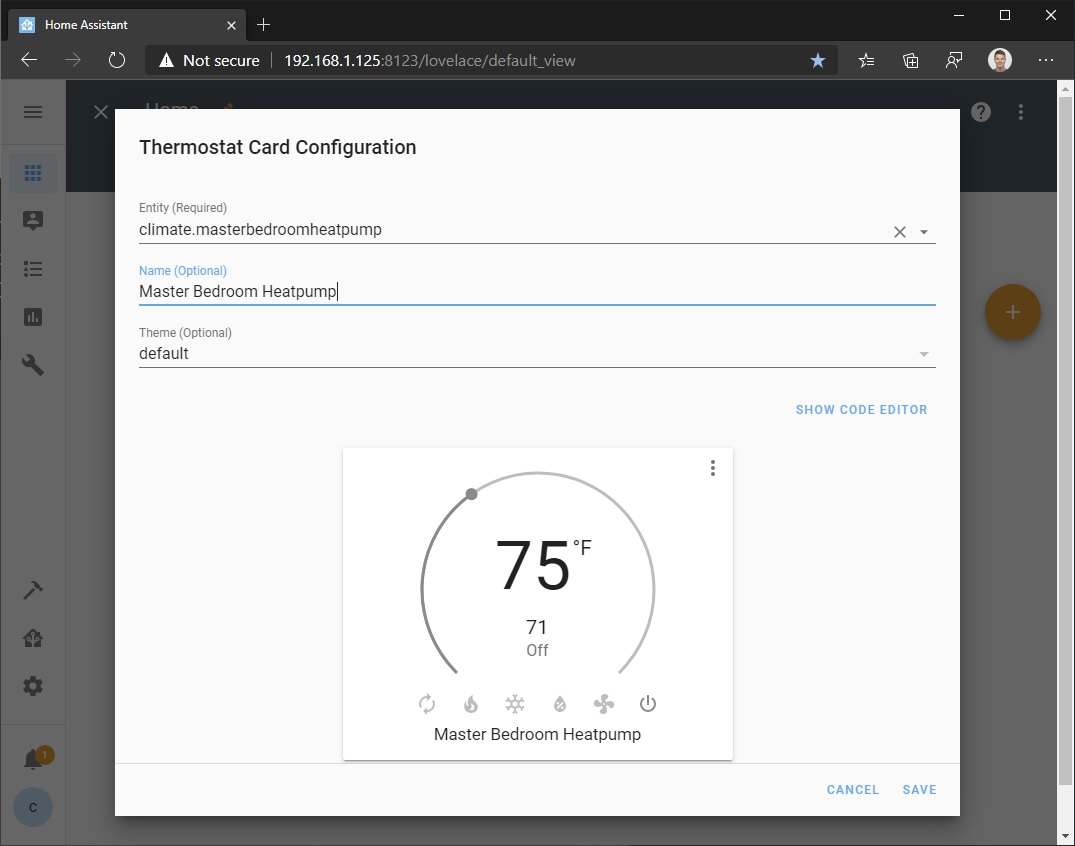
You may want to give it a more readable name.
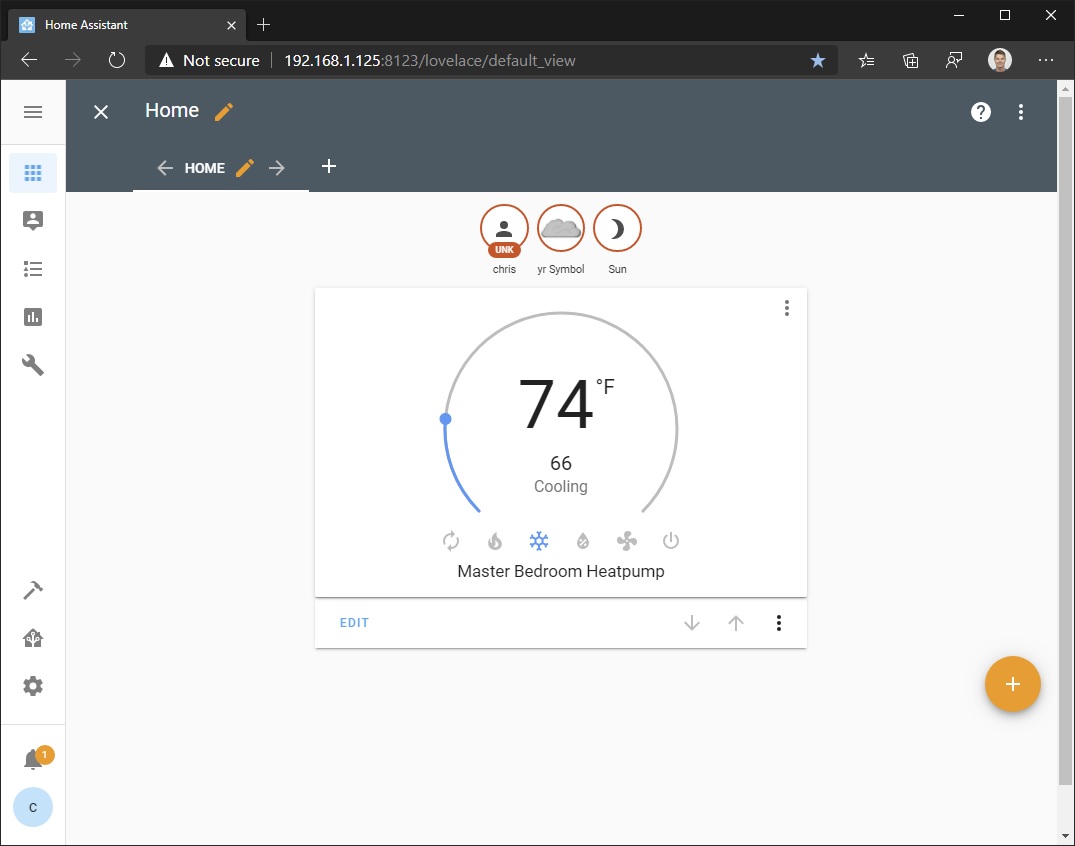
The device should now be on your home screen. Play with the settings to verify that the end-to-end communication with the heat pump is working.
Leave a comment